Old Red Barn
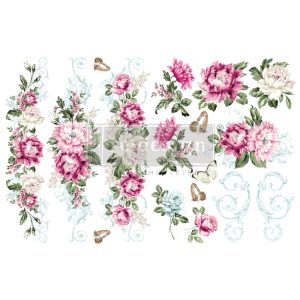
Springtime Peonies (21.59 x 27.94cm) - Redesign H2O Transfers®
Springtime Peonies (21.59 x 27.94cm) - Redesign H2O Transfers®
2 in stock
Couldn't load pickup availability
Applying Redesign H2O Transfers is truly child's play. Below we explain how it works.
You can use these transfers on wood, canvas, clay, glass, porcelain, paper, concrete, plastic and many more surfaces! Always test how your surface reacts to water before attempting to apply the H2O transfer.
The designs are rich and vibrant, but are most evident on light backgrounds. If you want a more muted effect, choose a dark paint color.
STEP 1
The H2O transfers are applied with water. Since water will reactivate the Chalk Paint, you must first protect your painted surface with Annie Sloan Lacquer. Make sure the lacquer is completely dry before starting the next step. Do not use clear wax as protection, as the H2O transfers will not adhere to it!
STEP 2
Moisten the surface on which you want to apply the transfer. Use a fine mist sprayer , paintbrush, sponge, wet paper towel, etc. to apply the water. Make sure you spread the water evenly and that the surface feels damp, but certainly not soaked.
STEP 3
Remove the protective film from the transfer and place your transfer on your project, with the colored side down and the gray side up. The gray drawing will help you place the transfer where you want more easily.
STEP 4
Now moisten the top of the transfer, without soaking it. Use a plastic or rubber spatula and gently wipe the paper so the image transfers. Let the paper sit on the surface for at least 6 minutes while rubbing gently. Then carefully pull away the paper. If parts of the image have not been transferred properly, you can put the paper back and rub again with a spatula until you get the desired result.
STEP 5
H2O Transfers® have a glossy finish. Use a matte Lacquer if you want a matte look. You can also finish it with clear wax.
And you're done...!


